Saturday, February 26, 2011

A New Space to Decorate!

I am so excited because I have a new space to decorate!!!  No...I did not discover a secret room in my house, but that would have been pretty cool.  My mom just bought a condo right down the road!

My mom lives in Washington DC full time in an amazing 4 story walkup.  The charm of her two bedroom, two bath 1920's apartment grabs you right when you walk in the door.  The original hard wood floors, huge windows and real fireplace are lovely.  She recently hired a decorator who I have to say did an amazing job.  (My mom has never painted a wall in her entire life.  She has great taste but is not a DIY'er!)  Here is a pic of her front room...please note the Christmas Card from the White House on her mantel.  She works in the White House Communications Office and is very proud that the Pres himself sent her a personal Christmas Card this year!  I'm a little jealous!


Don't you love how they painted the back of the built-ins to go with the furniture!  It really makes them POP!

However even with this great apartment in DC she just couldn't resist the amazing mountain ranges, beautiful ocean views and tropical weather of Madison, Wisconsin!  (OK, I say things like this but Madison really is a beautiful place, but for none of the reasons I just listed.)  The truth is she couldn't stay away from her three granddaughters.  Who could blame her...they are adorable!  So she has bought a condo in Madison so she can spend as much time here as she wants.  Making the parents of the adorable granddaughters very happy!

The condo is brand new.  Never lived in.  It is a two bedroom space with great light, an open living area and upgraded finishes.  Here is the floor plan...

Unit 221

And here is her condo staged for sale...

IMG_2007

And it is my new decorating project.  Well kind of.  I have a huge decorating project on my hands in my own home and my mom is not willing to hand over all control.  But we are going to have a great time shopping, creating and painting her new place together!  (Correction...I will paint...she will select colors.)

Actually...we have already started.  When she was out here last we both fell in love with an antique bedroom vanity.  You know, the kind you picture a little girl sitting at going through all her mom's makeup and jewelry.  Actually my best friend's mom had one just like it when I was young and I remember doing exactly that.  Putting on lipstick.  Trying on all her jewelry at once.  Spraying ourselves with her expensive perfume.  Here it is...


When I look at this I can see my daughter looking at herself in the mirror, playing with all of grandma's beautiful things.

We found it at a resale furniture shop and I managed to bargain a good deal for it.  I am planning to re-upholster the seat but otherwise it is in great shape.  It will go in her Master Bedroom along with my next project.  I plan to make an upholstered headboard once my mom picks out the fabric.  I have always wanted to do this and Sherry and John from Young House Love make it look so easy here that I can't wait to try!  And even if I screw it up she has to pretend to like it....she is my mom!   

Wednesday, February 23, 2011

Trash, Treasure or Just More STUFF?


There is a theme in blogdom this week and it all revolves around the stuff we spend our hard earned money on and the way it clogs up our homes, our minds and our timeThe Nester calls it "I hate to pass up a good deal-itis disease".  Ring a bell?  It sure does for me! 

And then the brilliant words of Rachel at Small Notebook sealed the deal.  (You have to read this post...it really is BRILLIANT!)  

Now don't get me wrong...I love cruising Craig's List, stopping in at Goodwill, strolling the isles of my favorite antique shops and there is no harm in that.  The troublesome behavior comes when we start buying stuff we just don't need!  I do find value in the concept that you should buy something great when you see it and I do this often (like this fun Apples sign I just bought for my kitchen), but I also think there should be some rules that go with that. 


The first thing I always ask myself is "would I buy this if it weren't on sale?"  If I really love it the answer is YES and the fact that it is a bargain is just icing on the cake!  The next rule is I have to know what I am going to do with it when I get home.  Not "I will find a spot for it at some point".  Which is exactly what I did with this fantastic blue pitcher.  I saw it, loved it, bought it with no plan of what I was going to do with it and now it sits in my kitchen cabinet lonely and unused.  (Even as I write this I think, but I will use it someday!) 


And my final rule...and this is a new one to me... is it has to be on "THE LIST".  I have just started a list of things I want for the house.  I keep this list with me and when I go to my favorite spots I look for and only buy the things on the list.  (At least this is the concept.  I am just starting to put it into practice.) I can still search out a good deal and now I have the added enjoyment of finding just what I needed and getting to cross something off my list.  (I LOVE crossing things off lists.  I sometimes write things down on my daily to-do list that I have already done just so I can cross them off!)


This topic couldn't come at a more perfect time for me, as my husband and I have just decided to go credit card free.  Yes, ladies and gentlemen we have removed the credit cards from our wallets and are only spending what we have.  Crazy concept, I know!  We have been talking about this on and off for a while now, but this finally pushed me to get on board and take the leap.  The best thing it has done for me (so far) is to make me slow down and think before I spend.  Do I really need more stuff or are there bigger more important goals that this money can help me accomplish?  Yes even the $7 I was going to spend at Starbucks can get me one step closer to sending my daughter to college. 

In the insightful words of Small Notebook ...

No one of us ever said, ”I hope I have a big house full of things that I bought just because they were on sale.”


Sunday, February 20, 2011

Organizing My Inspiration

Is it possible to have to much inspiration?  NO WAY!  But it is possible to have to much clutter of inspiration!  I gather my design inspiration from catalogues, magazines, websites, blogs, pictures...all different kinds of media.  I tear them out, cut them out and print them out and then pile them up.  And this is where the clutter of inspiration starts to develop. 


I stick all this stuff in a drawer where it hides away and has become forgotten.  But what good is inspiration if it is forgotten?!?!?  NONE if you ask me!  So I decided it is time to unforget my inspiration and display it in a place I will see everyday.  Here is a sneak peek...


Now I have been using "My Room" a good amount.  I have all my craft items and doodads in there.  And it is a great spot to work on a project that isn't going to get done right away because I can leave everything right where it is, close the door and walk away...bliss.  But I have not gotten around to decorating or furnishing it at all.  It still looks likes this...


(Wow, I'm a little embarrassed that I just showed that to the world!)

But none the less it is the perfect place to display my inspiration.  In my daughter's first room I bought this great mobile and filled it with pictures of family and elephant cutouts.  (Her first room was elephant themed.)  Here is a pic from the store where I bought it and click above for the link.  It is only $10!

MobilePhotoClip10Clips.jpg

It is so fun and totally personal!  But it isn't perfect in her new space so it has gone unused...until now because it is the perfect way to display all my inspiration.  Organization and art all in one!


The clips work great with paper, fabric, pictures, ribbon, anything you could think of.  And it is so easy to switch things out that I can continue to rotate the display as the feeling grabs me.  I hung it right in front of the window so the light catches the colors and shows them off beautifully.


And once I get some color on the walls, furniture in the room, um maybe even a chair to sit on it will look even better!  The two pieces of fabric you see in the top picture (bottom left and along the top) are the jumping off point for the design.  I have a long list of to-do's before I even think about this room, but someday it will look beautiful and serene...exactly what a mom room should be!

Thursday, February 17, 2011

Blues and Teals

I have been swooning over the amazing teals that are hitting the decor pages these days.  Look at some of these wonderful spaces...


11-12-cb2-teal.jpg

So when we were discussing what color to paint the Grand Piano Room (which others may call a living room, but oh no...not us!) I enthusiastically suggested teal.  I thought my argument was pretty convincing.  It even included pictures and accessory ideas and even some batting of my eyelashes.  But my husband has become a professional at resisting my adorableness so even my best attempts did not convince him.  So to the paint isle we went. 

The plan was to split up and each grab color cards we liked, which I saw as the perfect opportunity to once again plead my case and this time win for sure.  I bounced around picking out every type of teal I saw...giving him options was the key.  I skipped my way back toward my him thinking I had this one in the bag.  Being the wonderful husband he is he humored me for a few minutes looking at the colors and pretending to consider them.  But in the end I lost, well kind of lost.  We picked a great blue for the living room, not teal, but a bright vibrant blue that I love none the less.  Check it out...


We thought choosing a bold color like this would really make the room pop and bring in enough color to cancel out the cream walls in the family room and kitchen.  It will also go great with the white molding!

AND, yes there is an "and" thank goodness, we compromised that I could do the teal in our bedroom!  Yippee!  To make me feel even better I got to pick out the teal, buy it and race home and put a sample on the wall.  Now it looks a little similar to the Grand Piano Room blue in this pic but it is not.  It is very different!  And SO PRETTY...


So the plan is to paint the Gran Piano Room this beautiful blue both above and below the chair rail.  We already have great furniture and accessories in this room so then we will be done in there.  (Yeah right.  I can't even say that with a straight face.)  And then we will paint the wall behind the bed in the Master teal and the other walls white to brighten up the space and tone down some of the yellow glow the carpet creates.  We will accessorize the bedroom with oranges and tans to compliment the teal.  Did I already say SO PRETTY! I can't wait!  Grand Piano Room first then on to the Master Bedroom. 

Tuesday, February 15, 2011

MY Blue French Horn

Long ago you may remember this post.  I was just days away from completing the final chair for the kitchen table.  Well, days have turned into weeks and weeks are now over a month BUT the last chair is finally complete. 

Do any of you watch How I Met Your Mother?  I love this show.  And now that old episodes are on TV any time of the day I have been catching up on great moments from the past.  Like when they saw Lily's doppelganger as a stripper...hilarious!  Or Slapsgiving!  Cracks me up every time.  WHAT?  You are wondering what the heck this has to do with my chair!  Well, the final chair is my very own Blue French Horn (you know the one Ted stole for Robin from the restaurant on their first date).  That is all I can think of when I see this chair because it is the EXACT same color and I love it!  See for yourself...


My very own Blue French Horn to complete my kitchen.  Everything I ever wanted and more!  To bad my husband didn't steal it off the wall in a restaurant, or actually maybe a good thing as I really like hanging out with him at home rather than in jail.  Sorry, lost my train of thought again.  So here is the finished product.  One refinshied table and 4 beautiful chairs.  Ta Da!


Saturday, February 12, 2011

Thrifty Rug Solution

I do like rugs.  I like how they can tie the feeling of a space together, add color and complete a look.  They are kind of like a great pair of shoes!  I admire beautiful rugs in friends homes' and I love how Candice (from HGTV) even puts rugs over carpets.  But alas, I have never invested in a real rug (and by real, I mean a good quality one).  It is strange that deep down I feel like investing in a great rug is to adult for me?  I am married, own a home, am a mother, but am not enough of an adult to buy a rug?!?!  Strange, I know!

This same thought came to mind when I was shopping for an accent rug to finish off my daughter's room.  And other then being "adult", it seems impractical to spend a good chunk of change on a rug that will be played on, crawled on, spilled on and probably often end up in my daughter's mouth.  (That is where EVERYTHING ends up right now.)  Don't get me wrong, there are some great kids room rugs out there like these from Land of Nod ($299 for the 5x8)

Better Floors and Garden Rug

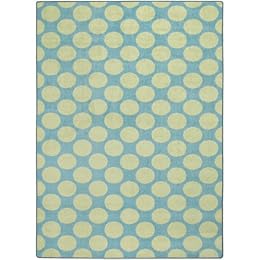
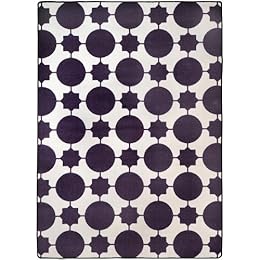
or these from the Seventeen Flirt collection at Target ($199 for the 5x8)....

Product Image Seventeen® Flirt Dots Rug - Light Blue (2'8"x3'10")Product Image Seventeen Flirt Tile Rug - Navy (2'8"x3'11")

All great and all make me cringe at the price.  So of course I went to work finding a solution to the problem.  I know, always the problem solver :)  After wandering the isles at Target and wandering the halls at my house I came up with my winning idea.  BATH MATS!  Inexpensive, easy to wash, the rubber backing easily sticks to the carpet and bright colors are easy to find!  I realize bath mats are small and only come in a couple of shapes but lucky for me they came in the one shape I needed, ROUND!  So here it is (4 bath mats from Target $8.99 a piece!)...


And here they are in the room...


I'm super thrilled with how they turned out!  The colors work great and they look good anywhere in the room.  (My daughter keeps crawling them into different positions.)  They are also super soft and fluffy and you can't beat the price!

Some day I will save up some money and make my first grown-up rug purchase.  I will then barricade the room with transparent plexi-glass so that guests can admire the room but not possibly spill something on my big ADULT rug!

Thursday, February 10, 2011

Some Inspiration

One thing I love about the blogging community is the support we all give and get from each other.  There are many blogs out their like mine (yes, you can read other blogs but don't stop reading mine!).  And I get inspiration from them everyday.  So today I wanted to share a little of that inspiration with you.  Here are a few wonderful projects I came across recently, which I plan on doing all myself!

Let's begin with this wonderfully eclectic use of vintage plates from Liz Marie.  The white is brilliant and the simplicity is great.  I may steal this for the wall in my dinning room!


Look and this simple and amazing chair redo from Thrifty and Chic!  This will be the perfect project for the corner of my guest room.

 Before...
                                        
       After...
  

Now this window seat is brilliant!  I never would have thought of this but now can't believe I never thought of this!  Great work from Less Than Perfect Life of Bliss!


If you have a blog you like to follow, of any kind, leave it in a comment below so we can all check it out!

Tuesday, February 8, 2011

DIY Curtains

A no sew do-it-yourself curtain, now that is my kind of project.  Thank you Young House Love for showing me the light!


The first step...find fabric.  Seems simple enough but this may take a little patience.  I did have to go to several stores before I found what I wanted for the right price.  Fabric is not cheap.  Well good fabric is not cheap.  But fabric stores do have sales so if you are a little patient you can find what you want for a good price.  I purchased 5 yards of fabric to complete this project.  Do keep in mind, I only did one curtain panel for each window, not two.  The windows in Bean's room are small and there are already blinds so this was for decorative purposes only...not trying to block out light.  Here is the wonderful fabric a chose...


Numero dos...cut fabric.  I started by cutting the 5 yards of fabric into two pieces.  I simply laid it on the floor, lined it up with the wall for a straight edge, folded it back on itself, then I cut it at the seam.  (I did measure it to make sure it was the length I wanted.)  Each piece came to 91".  Perfecto!  The fabric was already the perfect width (56.5") so no cutting there.


Step three...measuring the hems.  I wanted the curtains to be at least 84" long and 40" wide.  Please note: I am working with narrow windows so you probably want more width then I needed.  After a few quick calculations I determined a 1.5" inch hem on all sides would give me 85" in length and 50.5" in width.  A little extra for grazing the floor and bunching to the side.  I measured three inches down on all sides, marked it with painters tape and my hems were ready to go.

FOUR...the NO SEW step!  The secret ingredient to making this happen is iron on hem tape.  Sounds flimsy?  Not at all!  It works beautifully!  I used "Heat N Bond Ultrahold" which I found at Michael's.


The final step...hang your curtains.  You will need curtain rods & curtain clips (unless you create a curtain rod pocket using the hem tape, which I did not).  You can find both of these at Target for less than $10 each.  Hang the curtain rods according to the directions but take a moment to think about their position!  Do you want the fabric to pool on the floor?  If so mount the rod a little lower.  Do you want to widen or heighten the windows?  If so mount the rod wider or higher then the actual window.  There are lots of little tricks here to create the illusion you want.  For tie-backs I spent $2 on ribbon at JoAnn's and just, well, tie them back!


The real final step...look at what you made and jump up and down with GLEE!  At least that is what I did.  (Sorry, no picture of jumping available.)


All of the little projects are starting to come together!  So what is left...YES, the chair rail.  I am intimidated by this, I have to admit.  But now we have all the pieces and equipment so no more excuses.  It will get done.  Then what, accent "rug" (I have a great plan for this!), put up the shelves, put up a couple of pictures and the room will be done!  Which means I can move on to my next obsession, which room this will be changes on a daily basis, but it will be an obsession none the less.

Sunday, February 6, 2011

A Guest Book Twist

I have never been into the formality of guest books.  We didn't even have one at our wedding.  But since our recent move to the diaryland of Wisconsin we have had many visitors.  I realize this may have more to do with the adorableness (yes that is a word) of our daughter, then with the allure of this frozen tundra but either way we will take it.

In order to capture some of the memories of these visits I created my version of a guest book.  I was first inspired by a guest on the Nate Berkus Show.  (I heart Nate!)  She was talking about putting family pictures in bowls on display throughout the house...a quick and totally informal photo album.  I thought the bowl idea was great so I ran with it.  I also then ran around town collecting postcards.  Wisconsin postcards of course.  I put them in a bowl and there it was, instant guest book.


What is that you say?  A bowl of postcards does not make a guestbook.  Oh, have a little fun with me.  Once you add some instructions it makes a great guestbook!


                               The instructions say:                                
Send One, Leave One
Send a postcard to a friend.
Stamps are in the top drawer.
Leave a postcard note for us to remember your visit.


After a few more visitors the bowl will be full of postcards written to us by friends and family!  And all I have to do is keep buying postcards! 

Details of this project are very simple.  The bowl is a blue mixing bowl from my kitchen.  I reused a frame I already had.  I spent 69 cents on a piece of decorative paper at Michael's to use as the background in the frame.  I printed out the instructions on my computer.  10 minutes, maybe 15 and my guest book was complete!  Can't wait for you to come visit!

Thursday, February 3, 2011

What I've Learned in 2011

What, to soon?  No way! I know it is only February 3rd, but I feel like I have already learned a valuable lesson in 2011.  So all that says to me is this is going to be a good year! 

Warning: There are no pictures in this post just me sharing and preaching, a little.  But I just can't stop myself.

Since I have begun this journey, and this blog, I have heard a lot of the same sentiment from my readers and friends.  Comments are often along the lines of "how do have time to do this stuff" and "I have always wanted to do that but just don't think I know how."  What I am hear to say is this was EXACTLY me 6 months ago.  I loved design.  Actually I mostly loved other people's design.  I admired and envied their ability to take on a project and make it happen.  I admired their vision and ability to make it come to life in their home.  I admired the fact that they were doing what I always wanted to do myself. 

When I moved to Madison I came to have more time at home.  Not "more time" mind you just more time at home.  My life as a stay at home mom is just as busy if not more busy then when I was working full time, but now more of that time is spent within my own home and I felt like I was being handed an opportunity.  The opportunity to make one of my dreams happen. 

I started by reading.  I read blogs daily about women who were decorating, painting, crafting and making their homes beautiful all on a budget.  And over time my mindset switched from wow they are totally amazing (in an unreachable kind of way) to wow they are totally amazing and I can do this stuff!  So I tried.  I read and researched before I started anything.  I learned as much as I could to boost my confidence.  I made sure I didn't invest to much money in my first project so if it was a disaster then no huge loss and I jumped right in.  And it wasn't a disaster it was a huge success.  And now my family eats dinner at it every night which is SO gratifying! 

What is my point...my point is YOU CAN DO THIS!  Weather it is design or photography or writing or crafting or cooking you can do this!  Don't ever tell yourself "I just don't know how" like I always did.  You can learn how, that is what the Internet is for!   And YOU DO HAVE TIME!  You can steal an hour here and there.  You can work on a project at night once the kids are asleep.  Your husband CAN give you an hour on Saturday to work in the garage.  Projects might not happen at light speed but they will happen.

You are smart, creative, passionate and worth the time.  And in the end your entire family will win with a happier, more confident you...not to mention a beautiful home to boot!

I have found such meaning and passion in decorating my home and writing this blog.  It gives me creativity and connection every day.  And without that I would be missing out on something huge.     

Tuesday, February 1, 2011

The Next Project

I have been on a long search for the perfect curtain solution in my daughter's room and I have finally found it!  At first I envisioned a cream curtain with a bright pink vertical panel on the crib side.  One for each window which would nicely frame the bed.  But as I started looking for fabric I just wasn't finding what I wanted and started questioning my original plan.  To many vertical stripes???  So then I bought a few curtains at Target...and then returned them.  Not what I wanted either.  Next I went to JoAnn's and found a beautiful paisley pink and green fabric that was to die for, but so was the price.  Time to move on again (but I will still dream of that gorgeous paisley).  Today I went to Hancock Fabrics and was giddy when I walked into a 40% off sale.  Yippee!  So the search came to an end.  Green, pink, no stripes and perfect for a game of Twister...


Now as I have mentioned before, my sister-in-law is the go to sewer in the family.  She has made beautiful quilts and curtains and I have always envied her ability to use a sewing machine.  (Read - I have NO IDEA how to even turn one on.)  So once the purchase was made I immediately sought out her advice.  She brought up the no sew method that some of our favorite bloggers use at YoungHouseLove.  I had also thought of this but now that I have a professionals approval I am going for it.  Sherry and John have used this method many times and swear by it so I am going to give it a try.  You can read more about it here.

I have also been thinking that I would love a growth chart for the back of Bean's door to bring in more color and pattern and to follow her as she grows.  Have any of you ever made a growth chart?  I found this website and think I may try it out.  Look how cute these are!


You know what, one year ago I would have NEVER considered making this.  I was 100% a want something, go out and buy it kind of girl.  But now I have a new found love of making things personal.  And even if it doesn't turn out perfect, which no doubt it wont, it will be hand made from me to my daughter and that is way more valuable.  (At least that is what I am hoping my daughter will think when she is 13!)