Wednesday, March 30, 2011

Menu Art - A Work In Progress

We still have lots of bare walls in our home and it will take time to fill them all up, but I made a little progress this week.

For a long time now I have had the idea of using menus as art, but the exact way in which to do it has never come to me...until now.  The project is still coming together in pieces but it is off to a good start.

(The other sign says "eat")
I originally planned on using wood letters to spell the words "eat" and "well" but I just couldn't find the font I wanted at the price I wanted to pay.  But while wondering around JoAnn's I saw a small chalk board and came up with a new plan.  I bought two pre-cut wooden plaques ($2 each) and some picture hangers to attach to the back (another couple of bucks).  I used some left over chalkboard paint I had at home and quickly covered the plaques in two coats of paint.  Then I picked up these chalk board markers at Target.
These were a little pricey, especially considering I only needed one marker and used it to write 2 words.  I thought about using them then taking them back, and the thought continues to cross my mind, but I stopped myself.  There is a fine line between thrifty and cheap, right?!?!?!  

It is taking a little work to track down the menus I want.  I found these two online at the restaurant's websites and simply downloaded and printed them.  I am having a former neighbor send me a menu from Alice's - the amazing, mouth watering, I am drooling right now, little Chinese restaurant down the street from our old place in SF.  Oh Alice's how I miss thee.  And then I need to do a little driving to pick up the menu from our favorite chocolate shop here in town.  Does chocolate go with Chinese food?

Now the clips are turning out to be a little harder to find.  They are called bulldog clips.  You can find them at amazon.com, but I am just not willing to pay $8 in shipping for something that rings up to $4!  After some serious store searching - I had three employees searching every isle - I did find them at Michael's in the art / drafting section.  But of course they only had 2.  So I bought them and will have to go back.  (The perfect excuse to go back I should say!)


So the project is coming together...one meal at a time :)  Nothing better then fun, personal, thrifty and mouth watering art!  

Monday, March 28, 2011

Quality vs Thrift: Part 2

Shades of blue

Your may remember this post from a week or so ago.  Well as I said, when to buy quality does not only apply to furniture.  It applies to all aspects of our lives, including fashion!  My thrifty ways seem to creep over into all aspects of my life.  I often find myself grabbing tees at Target and shopping the online sales.  Now I will NEVER bash Target....I LOVE TARGET.  But I am not sure it is the best place to find all of my clothing.  But lucky for me one of my oldest and dearest friends is a Personal Stylist and Fashion Blogger from New York City. (Gosh it is a good thing I live far away.  Otherwise she may chase me down for some of my fashion selections!)  So when I started thinking about Quality vs Thrift in regards to fashion she is where I turned.

So a big welcome to Maria (cheers!) from Frolic in Tulle and Style By Risso

I asked Maria the following...We are all working to be so frugal these days but I still know there is value in buying good quality items.  So when do we spend the extra cash for the good stuff and when do we diy it...or shop the sales? And here is the brilliance she shared with me:

Thrifty in fashion terms can mean so many things. Fast fashion, flash sales, discount stores, vintage and consignment shops. You can find ridiculous deals on quality items at every turn thanks to online stores like Gilt Group, Hautelook and Rue La La. There are a few items that I tell my clients to splurge on, knowing that they will wear them for years and will literally have to fall apart before they let it go. They are the following: wool coat, boots, stellar handbag and running shoes. Here are the reasons why…

A wool coat for winter: It is important to buy a quality wool coat. A thrifty coat won’t last an entire season, the wool (if it is actually wool and not a poly/cotton blend) will pill within weeks, not to mention isn’t lined enough for the cold days and nights. So, save for a really great quality wool coat that will last years with good care.
Boots: Leather boots will last forever if they are good quality and the best part about these is they get better and better with age

One stellar handbag: Down the line your daughters/adopted daughters will thank and praise you for saving a few pennies for that authentic Chanel. It may take you years to get it but, by golly, will you be happy when you do.


Running shoes: Do not skimp on running shoes, your feet will thank you! They are built specifically for the activity of running. Trust the experts and get the best pair for you.

You can always buy less expensive t-shirts, pants, jeans, skirts, dresses, socks, blouses. H&M, Zara, Topshop, there are so many fast fashion stores now to find great pieces that last a season or two and won’t break the bank. Just don’t waist money on items you know you aren’t going to wear, not all trends have to be worn, and definitely not at the same time
!

I am totally picturing that person you see wearing every single trend all at once.  So much stuff they look like they are going to fall right over! 

But just like design, fashion calls for that balance of quality and fun. A few quality pieces go a long way!  So save up and invest in those forever fashionable items.  No use splurging on that stuff that will be gone next season.  Happy shopping!

Friday, March 25, 2011

My BIG Secret!

Holy cr&*, I pulled it off!  I HGTV'd my husband (kinda)!  I mean there were no lights, cameras, Genivieve or Candace but I did pull off a complete Master Bedroom makeover while my husband was away on a business trip!  Yup, I secretly collected items and made plans for weeks leading up to his trip and the moment he left I got to work.  My neighbor came over to help me move furniture (Thanks JD!).  I camped out on an air mattress in our spare and empty room and I worked my tail off to make it happen.  Hehehehe!
Remember this shot from our move-in tour.  "A hotel room" as my husband described it.  And a sad hotel room at that!


Ugh! 

But in 6 days it went from that to this...


Did I mention...I can't even believe I pulled it off!  You may remember my husband and I had selected this room color a few weeks ago.

And since we had already agreed on the color I figured the rest was fair game...right!  So I painted the wall behind our huge and slightly falling apart king bed this total obsession of mine teal (that is a color, right?!?).  Then, in order to lighten up the space and tone down the yellow hue, I painted the other 3 walls and ceiling white.  WOW what a difference!  First let me say, painting white is so fun!  No taping...quick edging...so easy!  And the white did exactly what I was hoping.  It completely lightened up the space.  LOVE IT!


Next came the art work.  I made these canvases last week, super easy.  They went up on the wall surrounding a great frame I picked up at Marshalls.  It goes perfectly with the other metalic accessories I pulled together for the space. 


The Craig's List chair you have heard so much about is my favorite part of the space!  My wonderful Sister-in-Law helped me sew the blue and yellow pillow using the left over fabric from the canvases.  She is a wonderful teacher and walked me through every step of the process.  I even used a sewing machine!  I know!  Don't fall off your chairs! 


The ottoman was another Marshalls purchase I bought weeks ago and hid away from my husband...so sneaky!

In order to bring a little drama to the windows I put together this great fabric combination.  Super simple...one long curtain rod, one patterned curtain panel in the center and two sheers to frame it.  Huge impact!

I wanted to keep the bed simple and clean so I went with this duvet which I found on sale at Target.  Reused some shams, added some new and we now have a crisp, clean, inviting bed.  I can't wait to crawl into it tonight!

A few more accessories and my extreme secret makeover was complete!  (I spent $8 total for all three pieces below at Goodwill!)


Now the room is not totally done.  We need more art on the walls.  I would love to find two nigthstands I can refinish as well as two lamps to go on the nightstands.  I dream of someday trading out our bed for a beautiful upholstered headboard, but ahhh all in due time.  For now I am pretty happy with my 6 day handy work and the surprise on my husbands face when he got home!  But now I need a nap!

Wednesday, March 23, 2011

Quality vs Thrift: Part 1


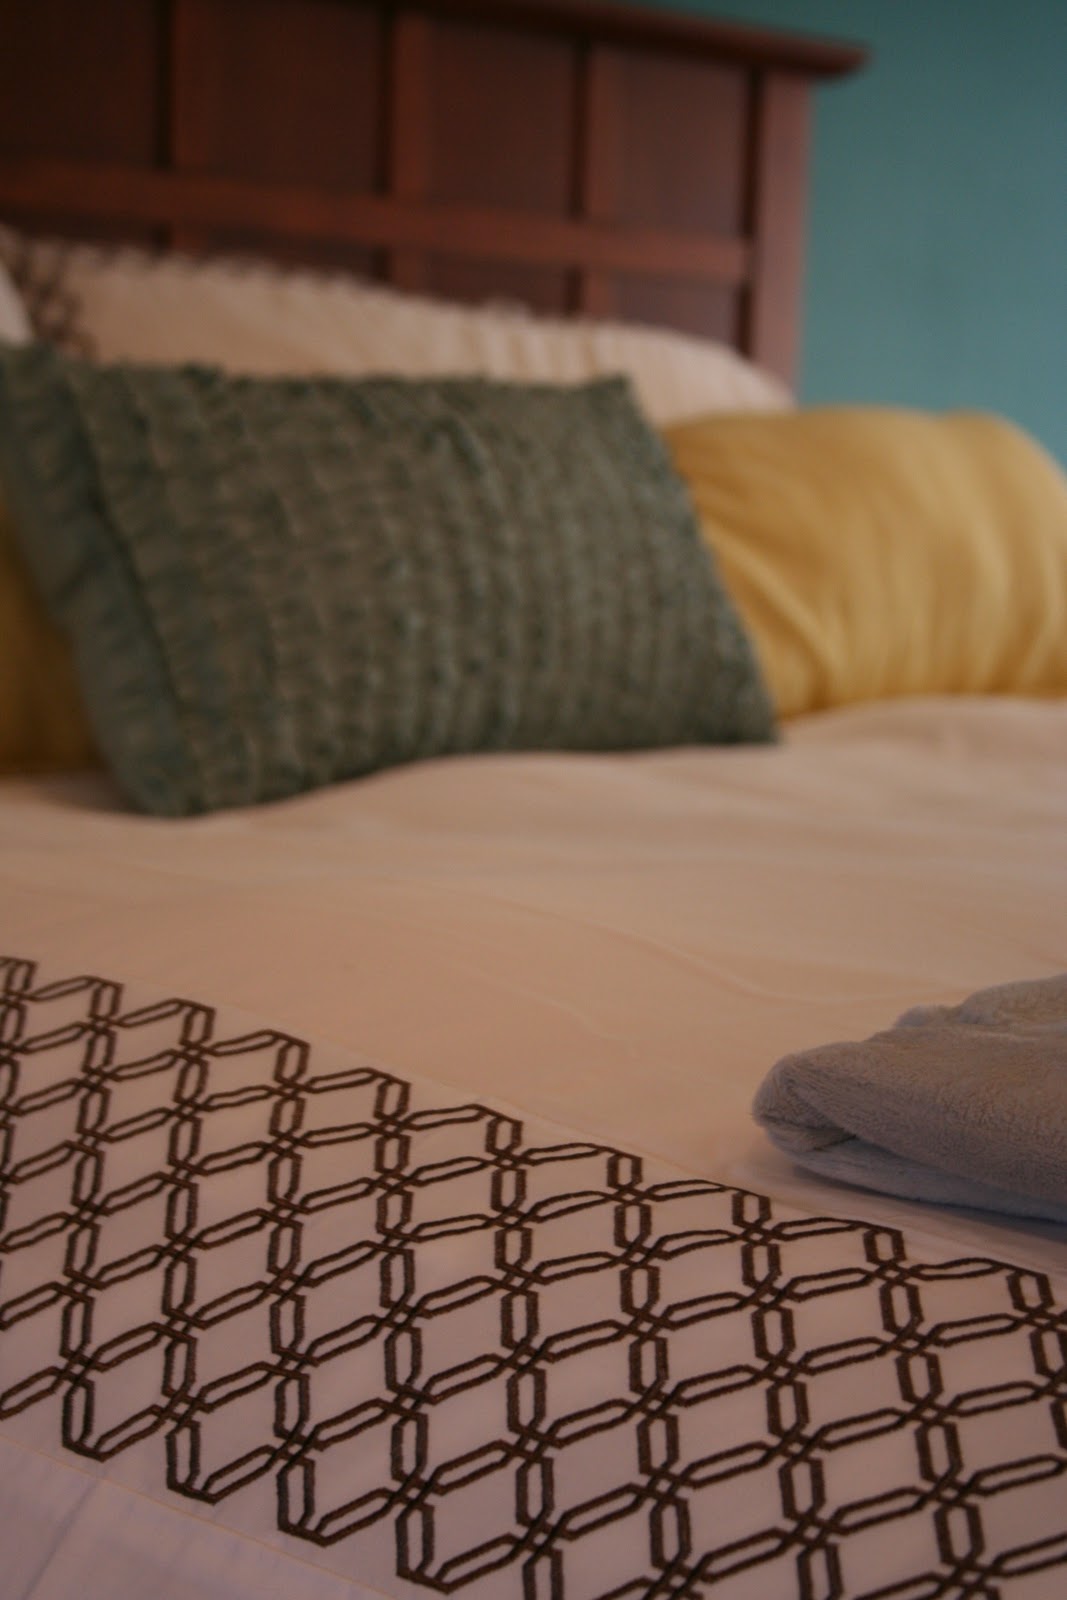
Are we the "DIY Generation"?  The Internet has made DIYing accessible to us all and it has changed the view from the thirty somethings couch.  If I want to make a headboard I search "how to make an upholstered headboard" and all of a sudden I am creating a beautiful, personal and affordable piece of furniture that ten minutes ago I had no idea how to do.  If I want to refinish a bookcase I simply search on Craig's List and can have a gently used, well priced bookcase in my garage that afternoon.

We pride ourselves on conquering the hunt.  We spend hours, days, weeks even finding that perfect piece at the perfectly thrifty price.  We then invest more hours, days and weeks into sanding, painting, recreating what we set out to find.  Don't get me wrong, I totally enjoy the process.  I love the thrill of the chase.  I love the satisfaction of talking down that thrift store owner $40 on that desk that I know with a little bit of love will be perfect for my home.  And I can't seem to drive by Goodwill without stopping in.

Maybe this is a virtue that all began that very first time in school our teacher taught us about recycling...you remember it...reduce, reuse, recycle.  (Wasn't there a song that went along with it?!?)  Although we may not intentionally have set out to save the earth, recycling is exactly what we are doing so rock on mother earth, we are here to do our part.

But inevitably one question pops into my head right about here.  When is it time to set aside the sander and invest in those bigger ticket items.  When do I buy a quality that will last me years to come.  When do I spend the money on the top notch couch because shoot we sit on it everyday (and if we are talking about my dogs, they sit on it for 10 hours everyday).  Well, I don't know the exact answer but here is what I have come up with...

1. What is your design personality?  Do you like to redo every room every year or two?  Do you easily get sick of your spaces and want to start all over.  If this is the case I feel like the argument for buying more expensive pieces in hard to make.  But if you want to invest in a quality dinning room table that you will use for a lifetime, even pass down to your children then I don't think IKEA will do.

2.  Does this piece define your room or just compliment it?  If the piece of furniture is the main focal point of the room then it needs to be high quality.  For example, upholstered chairs in your formal living room (I don't really know who has a formal living room anymore, but just go with it).  Go with quality, it will make the entire room look more expensive!  But the side table, bring in some character here with a quirky piece you picked up at the local consignment store at a great price.

3. How long do you expect the item to last?  This is tricky...what comes to mind once again is our couch.  We spent a lot of money on our couch.  It is a Pottery Barn slipcover couch, with a chaise and pull out bed.  Did I mention it was not cheap.  But here is the thing, with the very high usage our couch gets I don't think anything will be up to the challenge of lasting 5 years.  So even though I expected the Pottery Barn couch to last a lot longer I am thinking that with our next couch we just go for the IKEA slipcover couch and know that we will have to replace it in a few years.  But with the money we will save I wont feel so bad about it.  Now, I realize that doesn't really answer the above question, but you have to have realistic expectations.  A high quality dinning room table can last you a lifetime but the coffee table in your family room might barely make it two years.  Just keep this in mind when deciding how much to spend.

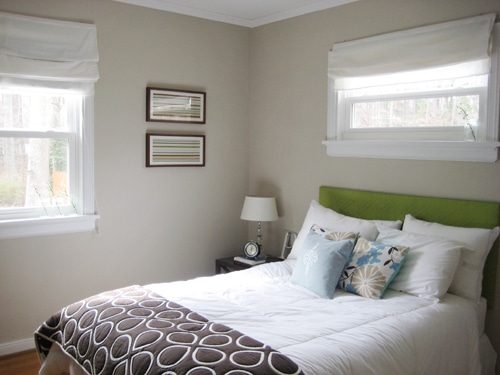
At the end of the day I think my favorite DIYers are the ones who understand how to make an $1000 bed look wonderful next to a $30 chair.  And a $500 desk look perfect framed by homemade no-sew curtains.  It is mixing the old with the new, the recycled with the never been touched, the personal with the practical.  This is how DIYing is done!

Now this is only "Part 1" of this post.  I feel like this question crosses over to much more then just design.  So I have hit up some of my expert friends in other territories to help me answer this question.  When to buy quality in your wardrobe or at the grocery store!?!?  Keep you eyes peeled for installment two coming soon.              

Monday, March 21, 2011

I Dream of Headboards

You know how there are certain decor items you have always wanted.  You always look for them in catalogues.  You picture them in your space and heaven forbid you see them in a friends house because that leads to nothing but pure jealousy.  Well that item for me is an upholstered headboard.  You know, the beautiful natural colored shaped headboards with the wonderful border of brass tacks.  Ahhhh...it dances in my head even now.

Raleigh Camelback Bed & Headboard with Nailhead

So this is on my someday list.  But until I get my someday bed there are easy ways to make a simplified version of an upholstered headboard.  I have not taken on this project yet myself but I am planning on doing it very soon in my mom's new condo.  I plan to follow the instructions from the great Sherry and John at Young House Love.  Here is a shot of the headboard they made for their guest room.


Great right?!?!  All you need to do is follow this link to see exactly how they did it.  Or you can wait a few weeks to let me try it out first.  I am happy to be your genie pig :)

But in the mean time here are a few more shots of the headboards that dance in my head as I fall asleep at night.  Wow...that is a little sad!


Nailhead Upholstered Headboard

Scroll Headboard

The final two are actually from  West Elm and not to pricey.  Maybe my dream is closer then I thought!

Saturday, March 19, 2011

A Little Shabby But It Will Be Chic!

The Craig's List chair update is here, but first a quick recap.  I bought this chair on Craig's List last week for a whopping $20!  Here is the original post.
A great find I think.  But it needed a little slipcover love.  I quickly found that any good slipcover was going to cost me $40 to $75 which would quickly take my purchase from frugal to eek, what did I do!  So I set out to find another solution.  My solution was to buy the slipcover I wanted out of the clearance bin (virtual clearance bin I should say...I bought it at everyslipcover.com) for 19 buckaroos but it was merchandise that had been returned but "not majorly damaged".  Of course no returns but free shipping.  Count me in!  The slipcover arrived a couple days ago and guess what...perfect condition.  No damage at all!

So I pulled it out of the packaging and let it sit flat for a couple of days, which got some but not all of the wrinkles out.  And then I got to work putting it on the chair...

I even read the directions...so unlike me.  Step one lay it on the chair.  Done.  Step two start to line up the seams.

Step three (this is my favorite part) take a large kitchen spoon and use the handle to tuck in the pieces.  So that is what I did, tucked, tucked and tucked. 

So a work in progress.  More wrinkles then I would like and not tucked perfectly but I will keep working with it and get it there.  With the right pillows, an ottoman and a cozy throw this shabby Craig's List find will be my chic little reading spot in no time. 

Now you may be wondering why I took these pictures in such a boring location.  I do have a reason and it is all part of this big secret I am keeping from you.  Actually it is a big secret I am keeping from someone else, but by default that means I am also keeping it from you.  But it will all be revealed soon...patience dear friends...patience!

Thursday, March 17, 2011

Fabric Makes Great Art

First of all, sorry I have been MIA this week.  I was ambushed by that nasty cold that is going around.  But 4 days in bed and I am back in action with a bunch of new projects on deck.  And I just finished one 10 minutes ago...

So you have seen this fabric in a few of my earlier posts.  Well, it is time to put it to use.


This is the easiest project in the world and really thrifty too!  Fabric canvas art...you have probably seen it done before but let me break down the simple steps for you here. Start out by strolling through your local craft or fabric store (this is the fun part).  Pick out a couple of fabrics that inspire you.  To make the size art I did you will need 1/2 a yard of each fabric.  So we are talking $10 investment so far.  Then head to the art isle and pick out 4 canvas boards.  I used 10x10 boards.  About $6 each.   

Simply lay the board down on the fabric and cut squares about an inch larger then the canvas on each side.  No exact measurements needed.
Grab your iron and quickly iron each piece of fabric using the "dry" setting.  Then lay the board on the fabric and start wrapping it and stapling it like a present.  (You will need a staple gun here.)


Easy enough...right!  It really is that simple.  And the grand total for all 4 art pieces was $34!  That is $8.50 per piece.  Seriously!  $8.50!  You can barely buy Starbucks for that much!

Now please ignore the top right canvas.  I ran out of staples with 6 left to go. Grrrrr!  That is what I get for thinking "I wont have to come back here for a while" as I was walking out of JoAnn's this morning.  So one more trip to the store and the project is done. 

Now I will reveal more details as the week goes on, but this is all part of a bigger project I have in the mix.  But the project is top secret!  Hehehehe I love the suspense!  You will just have to wait and see!

Sunday, March 13, 2011

What a Difference an Hour Makes!

Before I begin I would like to dedicate this post to Autumn at Space For Living. She writes a great "organizing your life" blog that I often read.  And since this post is about my own quick organizing project I thought it appropriate to send her a virtual high five right here!  Check her out! 

SO when I woke up this morning my garage looked like this...

 mixed with this...
topped with a little bit of this...


Then while driving home from the Kids Disco....yes we spent our day rockin out to "Celebrate Good Times, Come On!"  Did I mention Kids Disco is at a Brewery and a free beer is included for the adult crowd.  Sounding better and better, right!?!  But back to the story...while driving home my husband said "How about we get to do one of my projects during Bean's nap time today!"  clearly indicating that our free time has been filled with painting, thrift store shopping and talking about fabric.  Probably not his first choice.  So what was "his project"?  You guessed it...organizing the garage.  YUCK!

Now we are lucky enough to have a 3 car garage.  So although our garage is a mess it is mostly contained to the third unused garage space.  But I admit it is impossible to find anything in this space.  And I do manage to knock over one of our four bikes at least twice a day.  So it was time. 

We committed one hour to get as much done as we could and let me tell you two people focused on a goal not letting themselves get distracted can get A LOT done in one hour.  Want to see?

ONE HOUR to go from this...

 to this...


What!  Seriously!  No I swear, that is all it took!  And now when I walk in my garage I sigh with contentment, do a little dance, spin in two circles and then try to remember why I walked in there in the first place.  I mean look at it!


One Hour People!  You have one hour!  The only trick?  You have to be focused.  No texting, checking Facebook, looking for new posts on Mission Decorate (do that as soon as you are done however), NO getting distracted.  That alone can be an epic challenge but it is what you need to do!  Otherwise you loose track of what you where doing and you loose motivation.  Next thing you know one hour is one day and one day is 6 months and you garage, basement, craft room...whatever the space...is still full of crap!  Also having 4 hands is way better then 2 so recruit a little help from your teammate and make it happen and then tell me about it by posting a comment below!  Can't wait to hear what you can get done in one hour!

Thursday, March 10, 2011

It May Be A Huge Mistake

So let me start at the beginning...

I was doing my regular daily Craig's List browsing yesterday when I came across a chair.  A gently used cream colored (at least I assume it was cream back when it was new and clean) wing back chair.  Now I have been looking for a chair for both the guest room and master bedroom and I had a hunch this would do the trick. 

The seller (hi Molly, thanks for being so great) bought it a few years back at a garage sale.  Although she loves the chair it had become a clothing rack in her bedroom rather then the comfy reading spot she intended it to be so she decided it was time to find it a better home.  I have to mention here that that first thing my husband said when I told him about it was "nice, now I have a place to put my clothes"...grrrrrr. 

She was asking $30 for the chair which I thought was a screaming deal, but in the spirit of Craig's List I had to bargain.  We agreed on $20 and now the chair is mine. 


A little dingy but nothing that can't be fixed with a slipcover.  And this is where my story takes a turn for the "it may be a huge mistake".  I decided that Molly (I have named the chair after the seller.  Also note that one of my best friends is named Molly.  Hi Molly!  So many Molly's to keep track of!) will live in the master bedroom.  To go with the teal / white / yellow / orange motif we have dreamed up in there Molly needed to be a light tan or white.  But in keeping with the $20 screaming deal I got I didn't want to spend $45 / $60 / $80 for the slipcovers I liked.  So I kept searching and searching - my little fingers so tied from all the computer time.  And that is when I found this...

Texstyles - WNG-486 Nat - Peachskin Wing Chair Slipcover in Natural (T Cushion)

Molly's new cover!  It was $39.99.  Not bad, not great but OUT OF STOCK!  NOOOOOOOO!  About to sadly close out the website I noticed something on the bottom of the page...Molly's new cover was also listed on clearance for $19.  What, $19 but it says it is out of stock, I don't get it!  Well, it turns out this website sells returned items on clearance.  They say they do not sell anything that has been "seriously damaged" but the items might show "some wear".  So what did I do???? Duh!!!  I bought it!!!  Free shipping and a $19 slipcover.  This may be a huge mistake, seeing as how they are un-returnable, but if not killer score, right!  

So we have to wait a week or so to hear the conclusion of this story.  Will the slipcover look like the beautiful picture above or more like something out of the dumpster?  I figure if it is the latter I will write it off to research but if the gamble is a success then I just got my new bedroom reading chair for $40!  
  

Tuesday, March 8, 2011

The Nursery is COMPLETE!

HOORAY!!!  It is finally here...the COMPLETE nursery post!  It has been a process and I appreciate you following me along the way.  I am thrilled, proud, relieved and giddy to finally say my daughter's room is DONE (yes, that gets caps, italics and bold). 

I have shown you pieces of the project along the way like here and here.  And now is my chance to show you all the details as they have come together.  Warning: Lots of pictures to follow!

As you know, the original inspiration for this room came from Thrifty Decor ChickShe used similar stripes in her son's room and I loved them!  I followed her lead (and instructions) and they came out GREAT!


I varied the colors and size of the stripes to create this wonderful effect.  Check out the links above if you want the DIY details!


The display shelf was my husbands idea!  (Yes, my husband knows what a display shelf is.  He probably would have called it a "shelf for stuff we don't want Bean to reach" but he has the idea right!)  I used a simple piece of wood, added a little paint, a couple of Anthropologie brackets and our "stuff we don't want Bean to reach shelf" was done!


The "K" on the door was a Saturday night I'm a looser and have no plans tonight project.  I love how it turned out but unfortunately every time I see it I am reminded of the above mentioned Saturday night dilemma.  Oh well, I am a mom and am allowed to be a looser once in awhile!


The curtains where made by yours truly.  Yes, that is me...the one who is still proud of herself for this accomplishment.

* Um, reusing this pic.  The chair rail is done, but wasn't when I took this :) *


We added a chalkboard wall. (Yes, again a brilliant husband idea.  Sheesh, I am starting to think he should be writing this blog instead of me!)  Which will be the perfect art area for our little one as soon as she figures out chalk is for drawing not eating. 


And the latest addition was this simple art wall hanging above the chalkboard.  I pulled this together for a couple of dollars and in a couple of minutes.  Ribbon, clothes pins, pictures, a couple of nails and my favorite part of the room was created!


A few more shots for your viewing pleasure and then this room is a WRAP!  Or a RAP.  Whichever you feel is appropriate!