Wednesday, October 31, 2012

Happy Halloween!

HAPPY HALLOWEEN! 

Watch out for goblins, ghouls and ghosts.  Not to mention pirates!


Monday, October 29, 2012

They Are A Comin'

The holiday catalogs they are a comin'.  Everyday I open my mailbox to more browsing goodness.  Its like Christmas before Christmas!

Why do I love holiday catalogs and actually just catalogs in general?  Because they are full of ideas.  And not just oh I should buy that ideas but oh I can make that ideas!

So I thought I should put out a challenge to all of you.  Find something in a holiday catalog that you love and make it yourself.  And here is the thing - when you make your own version of something you see in a catalog yes it is true, it probably wont turn out perfect.  But I think that is the best part about it!  Whatever you create will be homemade, one of a kind and all yours.  You wont walk into a friends home and see the same thing sitting on their shelf.  Instead they will walk into your home and say wow, where did you get that?

So go for it!  Search through those catalogs and pick your challenge.  And once you are done email me the results at missiondecorate@gmail.com.  I can't wait to see what you come up with.  And if you need a few ideas to jump start your project here are a few things from Land of Nod that could easily be re-created.  I've actually already started on one myself!    


Decor_Scalloped_Tree_Group_r

Wreath_Scalloped_V2


Advent_Shapes_Fall32012

Calender_Advent_Pouch_Christmas

Friday, October 26, 2012

Decorating Your Child's Room With Their Help

Happy Friday everyone.  I am so excited to have a guest blogger here on Mission Decorate today!  So please let me introduce to you the wonderful and always insightful Kerrie LaRosa.  (Cheers & Applause!)

Kerrie is a mom of two, a licensed clinical social worker and a parent coach.  Kerrie is the person I turned to when my daughter had her first on the floor, kicking and screaming temper tantrum.  Her blog is the place I visit when I need a parenting kick in the pants.  And her website has given me invaluable resources to help me grow as a mama.

So today I asked Kerrie to help us with something that can be so fun...decorating your child's room with their help...but can also be a little tricky to navigate.  As always Kerrie pulls through with great tips and things to think about.  Thanks Kerrie!   


It is usually an exciting day when a child can participate in the fun task of decorating their room. It is usually when a milestone has been reached: they are old enough to help meaningfully, they are getting their own room for the first time, they are transitioning from a crib to a big bed or you have just moved into a new home.
Engaging your child in the process of decorating their own room can be exciting and helps boost a child's confidence and gives them a sense of control and ownership over their room. But, to make this project successful, consider some of these tips:
Make sure you are comfortable with allowing your child to help. Many people like to be in control and will feel too anxious about letting a child (of any age) participate in the decision-making or decorating of a room in their house. If you are not sure, try and come up with some small decision or task that your child can participate in and then complete the rest of the project yourself.
Consider your child's age and developmental skills to determine whether decorating her room is an appropriate task.
Of course make sure the task is safe for a child. I would not recommend having your child present for a lot of painting or structural work unless there is someone else there to watch him and keep him safe.  Make sure everyone is in the right mood to tackle the project. When you are ready to begin, make sure you have sufficient time to complete the task; everyone (parent and child) is well-fed and well-rested and in a calm mood. This will increase the chances that it will be a successful project and help you avoid a situation in which your child fingerpaints your favorite rug.
Another way to help your child feel engaged in the process (while you do the bulk of the work) is to allow your child to engage in parallel play while you work. If you are hammering nails in the wall to hang pictures, set up an area for your child to safely use her toy hammer; or let your child shine a flashlight on your workspace or use the tape measure to measure objects in the room. It is amazing how little projects can engage a child, make her feel helpful and keep her busy while you work!
Finally, here are some thoughts on specific ways to include your child in decorating his room.

- Let your child pick the paint colors, room theme, rug or his bedding. Make sure that you give your child specific options to choose from (limit it to under 5, preferably only 2), so you maintain some control of what the room looks like so you don't end up with black walls, a fluorescent green floor and bug decals plastered all over the room  (unless that is what you are into). 

- Let your child help put up wall decals. You can let her pick where they go, or if you want more control, you can choose where they go and let her stick them on the wall (or help stick them on the wall). The great thing about wall decals is they are not permanent and can be easily moved or removed (especially if your child's interests change frequently).

- Make the room a creative space for your child.  Use magnetic paint to create a magnet board where your child can learn and be creative.  Use chalkboard paint and create a space for art.  With magnetic and chalk board walls your child will continually be able to decorate her room.

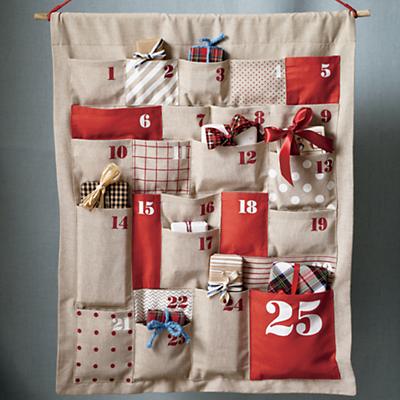
- Make it kid-friendly. Put up a magnet calendar, a coat rack he can reach, a reading corner, a homework space, a display for her artwork. All these will engage your child on a daily basis as well as encourage learning.

See I told you, great tips from Kerrie as always!  If you want to follow Kerrie's blog, learn more from her website or contact her just visit her here.  And if you have any stories about decorating with your children we would love to hear them.  Especially the funny ones!  Have a great weekend!       

Wednesday, October 24, 2012

His Office Space

I took a quick break from decorating on the home front this week to tackle a new space...my husband's office.  He recently moved into a larger office (movin' on up)  but he so lovely describes it as "the meth lab". His words, not mine.  But I kinda see where he is coming from


No windows, fluorescent lighting, gray, gray and more gray.  And this is coming from a girl who loves gray - this place needs help!

But before jumping into the undertow I thought I should do a little research.  And although I don't always follow design protocol I felt like getting a lay of the land was important on this one.

An office has to strike such a delicate balance.  You don't want to be the person with family photos filling every inch of wall space.  But you also don't want to be the schmuck who doesn't have a single shot of the kids.  You don't want to accessorize with your grandmas spoon collection but you want a little bit of you in the space.  And you want to have a comfortable spot for co-workers and / or clients to visit but you don't want the lazy-boy that encourages them to stay all day.

So here is where I have decided to focus...

1. Lighting.  I set out to ease the florescent as well as provide my husband with options.  One great way to help tired eyes and brains is to have the option to change the lighting.  Turn off the overhead and just work with lamps or turn off the lamps and let the overhead light act as your morning coffee or turn everything on allowing the lamp light to soften the overhead light.

2. Feng Shui. Yup you read that right - I'm a little bit hippy and a little bit rock and roll.  But really, I think flow and energy can really set the tone in a professional environment.  If you sit with your back toward the door you are unapproachable and cut-off.  If you have a huge desk top between you and your client you are cutting off connection.  But if instead you can create an open welcoming flow that still sets a professional functional tone then heck yeah, feng shui it up.  Here is a link if you want to read more about this.

3. Plants. You all know I have a love hate relationship with plants.  I love to over-water and they love to die which I hate.  But luckily my husband is not blessed with this same curse.  And plants are a great way to not only bring color and a natural feel into an office, but they can bring great air purifying qualities indoors as well.  Check out this list of top air purifying plants!

4. Art.  Ah art...your role in an office is so demanding.  You must not only bring color to a usually colorless space but you must also convey personality and professionalism at the same time.  The pressure is on!  I think a good way to strike this oh so challenging balance is to add some art that represents either the place you live or maybe a place you once lived - for example a picture or painting of a local theater or of local street signs.  But maybe not the beer list from your favorite drinking spot.

So this is what I am working with.  I am hoping to spring my husband from his gray dungeon as soon as possible so the conclusion to this post wont be far behind.  But in the mean time I would love your tips on decorating a business office or home office.  Just comment below or on FB!

Monday, October 22, 2012

I Caught You

I knew that was you...snooping around, peeking at the dining room.  Well no big reveal yet, but it is getting closer by the day.  My little hands are painting like crazy trying to wrap this baby up.  But until then I can only share a peek with you.  Let's call it a tease...

   
Yup, as always my work space is a total mess!  But there is a little of this going on...


And a little of this


Oh OK, I guess you can see this...


Got you excited with that last one, huh!?!?!  Well soon there will be lots more of that.  Can't wait to show you!

Thursday, October 18, 2012

Candy Bags

I am making slow but steady progress on the dining room.  Hopefully I will finish it up soon cause I can't wait to share it with you!   But in the meantime how about another quick and easy Halloween craft?!?!

We will be hitting the streets with some friends this year - 4 kids in total - so I thought it would be fun to make candy bags for each of the kiddos.  Nothing fancy, just colorful paper bags and glitter paper all from Michael's.


I grabbed my handy scissors and started cutting.  I glued the main pieces down with a glue stick but had to pull out the hot glue to glue glitter paper to glitter paper.  It just didn't like sticking to itself!  

So a little cutting and pasting later and we now have colorful bags to collect our loot.


My daughter is going as a pirate so the skull and crossbones are for her.  Arrrrggggggg.  

Tuesday, October 16, 2012

Webs & Spiders, Oh My

Halloween is 15 days away so it is time to get our decorating on!  (BTW I just finished eating a dark chocolate sea salt caramel from Whole Foods.  So Good!)  But anyways - now or never people.  And as I promised the jars are ready for their Halloween debut.  No more leaves and candles.  Now we've got creepy crawlies.


Webs and spiders from the dollar store took my Target jars (and a few additional mason jars) from Fall to freaky for just a few bucks.


And come Halloween night these babies will light up my front walk with orange glow sticks and lead the kiddos to yummy treats...


...and maybe a few tricks!

Friday, October 12, 2012

Rainy Day Ideas

It's Friday!  It's Friday!  It has been a chilly week in Madison and although the sun is shinning today the weekend is looking like rain.  So I thought I would share a few rainy days ideas for you and the kiddos.

Let's kick it off with this fun way to play, brought to you by  A Cup of Jo, a blog with all sorts of great ideas just like this one...


All you need is tape and toys for hours of fun!

If you are looking to make some Fall art why not get the kids involved with this Leaf Rubbing project from Filth Wizardry


Another great way to spend a rainy day is cooking with the munchkins.  Baking cookies is always a big hit.  So are rice crispy treats.  Here are some more ideas that are on my To Try list...

Crescent Pepperoni Rollups from Plain Chicken


Pancake Bites from The World According to Eggface


Or make a Mug Cake in minutes!  A fabulously fun idea from Babble

Chocolate Caramel Mug Cake 013 533x800 2 Minute Chocolate & Salted Caramel Mug Cake

I have actually made these for a casual dinner party.  They were a big hit...a little mad scientist, which everyone loved!

I hope everyone has a great weekend.  See you on the flip side!

Wednesday, October 10, 2012

Cork Coasters

Let me first say that I dropped my daughter off at preschool half an hour ago.  I do not have to work.  I have no errands to run.  I am sitting at a coffee shop, drinking a warm cup of tea and writing.  WHAT?!?!?  I know...true mom bliss.  Aren't you jealous?  But now to the point.

After making a scrap wood bulletin board over the weekend (you can check it out here) I had some cork left over.  And I came up with a totally brilliant off the charts idea.  OK that is a lie, that is totally not what happened.  In truth I was glancing at the package and reading their list of suggested uses and totally stole this idea from there.  Ha!  You never know where your inspiration will come from.

The package said Coasters.  And since my husbands man-cave, also known as the basement, is lacking in the coaster department I thought "hey that is not a bad idea".  So I pulled together the left over cork and cut them down to coaster size.


How dark and creepy is this picture!  I thought it needed a little Halloween decor in the corner. 

This stuff is very easy to cut with a good pair of scissors.  Then I dug out a "D" letter stencil and a black sharpie and did exactly what you are thinking I did...


Sorry, am I overly random this morning?  It must be the tea and two hours of freedom.  I just don't know what to do with myself!

So yes, cork + stencil + sharpie = coasters for the man-cave.


Keepin' it simple and straight forward for you this morning.  Just how I like it!

Monday, October 8, 2012

Thankschristmastrickortreat-ness

Without really meaning to, my holiday decorations have taken on a theme.  The theme is not due to planning or a well thought out blogging topic, but rather a desire to be cheap.  See I don't really get to far into holiday decorating because it seems kinda silly to invest a bunch of money into stuff that stays in a box 10 months a year.  But I am not a grinch.  I love me some holiday cheer.  So this year I have set out to conquer my need for thankschristmastrickortreat-ness and be practical at the same time.

So you ask..."Jill, how the heck are you going to pull that off."  And I say "multi-purpose multi-tasking".  Which means I'm gonna make and buy stuff I can use throughout the year as well as the holidays!

I have already started with that here - jars that can be used for all of the holidays as well as in a multitude of ways all over the house.


My next project fills two needs already!   The idea began when I was trying to come up with a fun way to display Christmas cards.  And my thought for this Christmas is to create a natural lodge look for my decorations (but more on that later).  So I thought I would create a bulletin board out of all the wood scraps in my garage.  It could rest next to the fireplace for a warm homey look.  And then as school started my fridge started piling up layers deep with hand outs, reminders, fliers, book orders, phone lists and I knew a bulletin board in the kitchen would come in very handy.  Which equals two uses for one project...yippee!

OK so now to this bulletin board that I'm going on and on about.  Well, it looks like this...


And to make it I collected some scraps of wood from my garage.  They where all the same thickness but varied in width, length and finish.


I decided what size I wanted the frame of my board by determining what would fit both next to the fireplace as well as above the kitchen desk.  Then I cut down the boards to match.

I also cut down a thinner piece of leftovers about 2 inches shorter then the total height of all the boards put together.  I attached this board to the back of all the other boards.  First using wood glue.


I let it dry overnight by placing some heavy 4x4's on top.  Now if you have clamps they work best.  But I do not so I had to improvise.


The next day I put one screw or nail into each board.  One screw or nail?  What the heck does that mean?!?!  What it means is I had 4 screws the right length so I used those first.  Then I had to use nails which were a little bit to long so I didn't hammer them in all the way, but no biggie cause no one will ever know since they are on the back.


Next I picked up some cork board at Michaels.


You can buy this in a sheet or in squares.  I opted for the squares since the squares come in more colors and thicknesses.  $12 for 4 squares but a 50% off coupon turned 12 into 6 and put a big smile on my face.  With a little bit more measuring I decided how much real-estate I wanted to cover in cork and I cut down the four squares.  The cork comes with little sticky thingies.


But I opted for wood glue instead.


Once again I weighted everything down and let it dry overnight.


This picture cracks me up.  Totally how a DIYer gets it done!

In the morning it was all dry.  A few stylish push-pins from Michaels (40% off coupon) later and for a grand total of $8 I had a dual purpose holiday project done.


Now I just have to hope people send my Christmas cards this year!  Oh I hope you all like me!

Wednesday, October 3, 2012

A Free Home For Your Tush

My husband and I love this little restaurant in downtown Madison that we swear has the best Italian food this side of Italy.  (Not actually sure which "side" of Italy Wisconsin is on but whatever!)  We tell everyone about it...now including you!  If you live in Madison or are ever anywhere near Madison you must check out Papavero for lunch or dinner.  Both menus are fabulous!


Yum.  I am hungry!  But there is a reason for my telling you this.  See Sunday night we we walking by on our way to the restaurant next door (only because Papavero is closed on Sundays) and we saw this...


"FREE IKEA CHAIRS!  Authentic!  Handmade!"  Cracked me up.  And of course these...


Yes, that is me taking the chairs for a tush test drive.  Not bad, not bad at all.  And y'all know how much I like free!  $25 a piece new, but free to me makes me very happy.

The chairs were in pretty good shape.  A little wiggly and in need of tightening up...no biggie.  And since we are often short on chairs when we have people over for dinner we snatched two right up.  And I'm sure you already guessed that I took the red ones.  I'm not one to pass up color!

So not only do you now know about a fabulous spot to eat but next time you come to our house for dinner your tush will have a home on our Favorite Restaurant Collection / Ikea Stefan chairs.  Happy sitting!      

Monday, October 1, 2012

Capturing Fall

Fall is in full swing in Madison, Wisconsin.  The kiddos are back in school, leaves are beginning to change colors and the weather could not be nicer.  It is truly lovely!

And when it comes to decorating I just love the colors that Fall brings.  The warm cozy oranges, greens and reds are such a welcome change from the cooler tones of Summer.  They make me want to drink tea, read a book and take in the cool fresh air.  

So I thought what better way to capture that feeling then to well...capture that feeling.  This so simple decor idea started when I spotted large glass jars at Target for $5.99 a piece.  I grabbed 4 and felt OK with spending the $23.96 because I knew exactly how I could use these babies for Fall, Halloween and Christmas decor.  WOW!  Three ideas in one!  

The first idea came together perfectly...


Leaves collected from the garden put together with simple candles, lining the front steps.


The perfect way to capture Fall!


Now I have to note that I like these even better without the jar lids on but our neighborhood has been taken over by Box-elder Bugs and so I'm hoping the lids will help keep them out, but they are sneaky little suckers so we shall see. 

And as I mentioned I have 2 more ways to use these jars so watch out...they will be back.  But nothing better then re-using especially for seasonal decor.  I think the key is to buy neutral items that can be dressed up along the way - a theme that you will see repeating itself through out the holidays because their is nothing worse (and less frugal) then spending a bunch of money on decor that you pack up and put away for 11 months out of the year!