
I apologize that I am about to be wordy but I gotta explain a little. Once all the children arrived and had a chance to play for a few minutes we gathered them around. I told them how excited Kylie was to have them at her party and that she had made them Backpack treats! But there was one problem...Swiper had come and taken all the treats out of the backpacks. So if they wanted their treats they were going to have to follow the Map.
OK, so break time here for your "how to make a backpack treat bag tutorial"...

Here is what you will need:
Purple Bags - paper or cloth I scored cloth bags at the dollar store - 2 for a $1
School Glue - the old school stuff
Red Paper
Yellow Paper
White Paper
Cream Paper
Ribbon
On the red paper you will print out the mouth

On the white paper you will print out the eyes

On the yellow paper you will print out the eyebrows

Now, I am still trying to figure out how you can download and print the above sheets straight from here but in the mean time just email me at missiondecorate at gmail dot com if you would like me to email them to you (or if you know how to create the link I need, please). I will send you the template and it will make your life much easier.
The next step is to cut out each face piece outside of the black print lines. You want the black lines. This takes a little time. When you are done just glue everything onto your bag!

And remember, School Glue dries clear so don't worry if a little squishes out on the sides.
Now for the map. First thing, you will want to print the map face so it falls in the upper left corner of the page. Haha! I can't get the pic below to rotate so you are just going to have to look at him sideways. But I am happy to email this to you and it is easy to rotate for printing.

Then take out a Sharpie and hand draw your map on a piece of paper. Keep it simple, they are 3 year olds after all! Mine looked like this...

Scan your drawing to your computer and print the map on the opposite side of the cream paper from the map face. Now all you have to do is roll up the map so the face is what you see and tie a ribbon around it.

One quick note - I decided to let the kiddos go to any of the three spots when they wanted, rather then go in a specific order. I found this spread everyone out a little bit.
Now you are wondering what my three stops were? But before I explain that I also want to add that we dressed the birthday girl up as Dora for a little extra fun. (It doesn't hurt that she already has the Dora haircut!)
Pink Shirt found at JoAnns
Orange Shorts which started out as leggings from Carters and my fab sister-in-law sewed into shorts
Yellow Socks oddly hard to find but eventually I found them at H&M
And Backpack found here
all these links take you right to the items I bought - told you I would make it easy :)

But back to the stops on the map...
First there was the Rainbow Cave - a room filled with all different color balloons. Each balloon had a treat hiding inside and the Explorers had to pop the balloon to get their surprise. (So sad, but I didn't get a pic of this.)
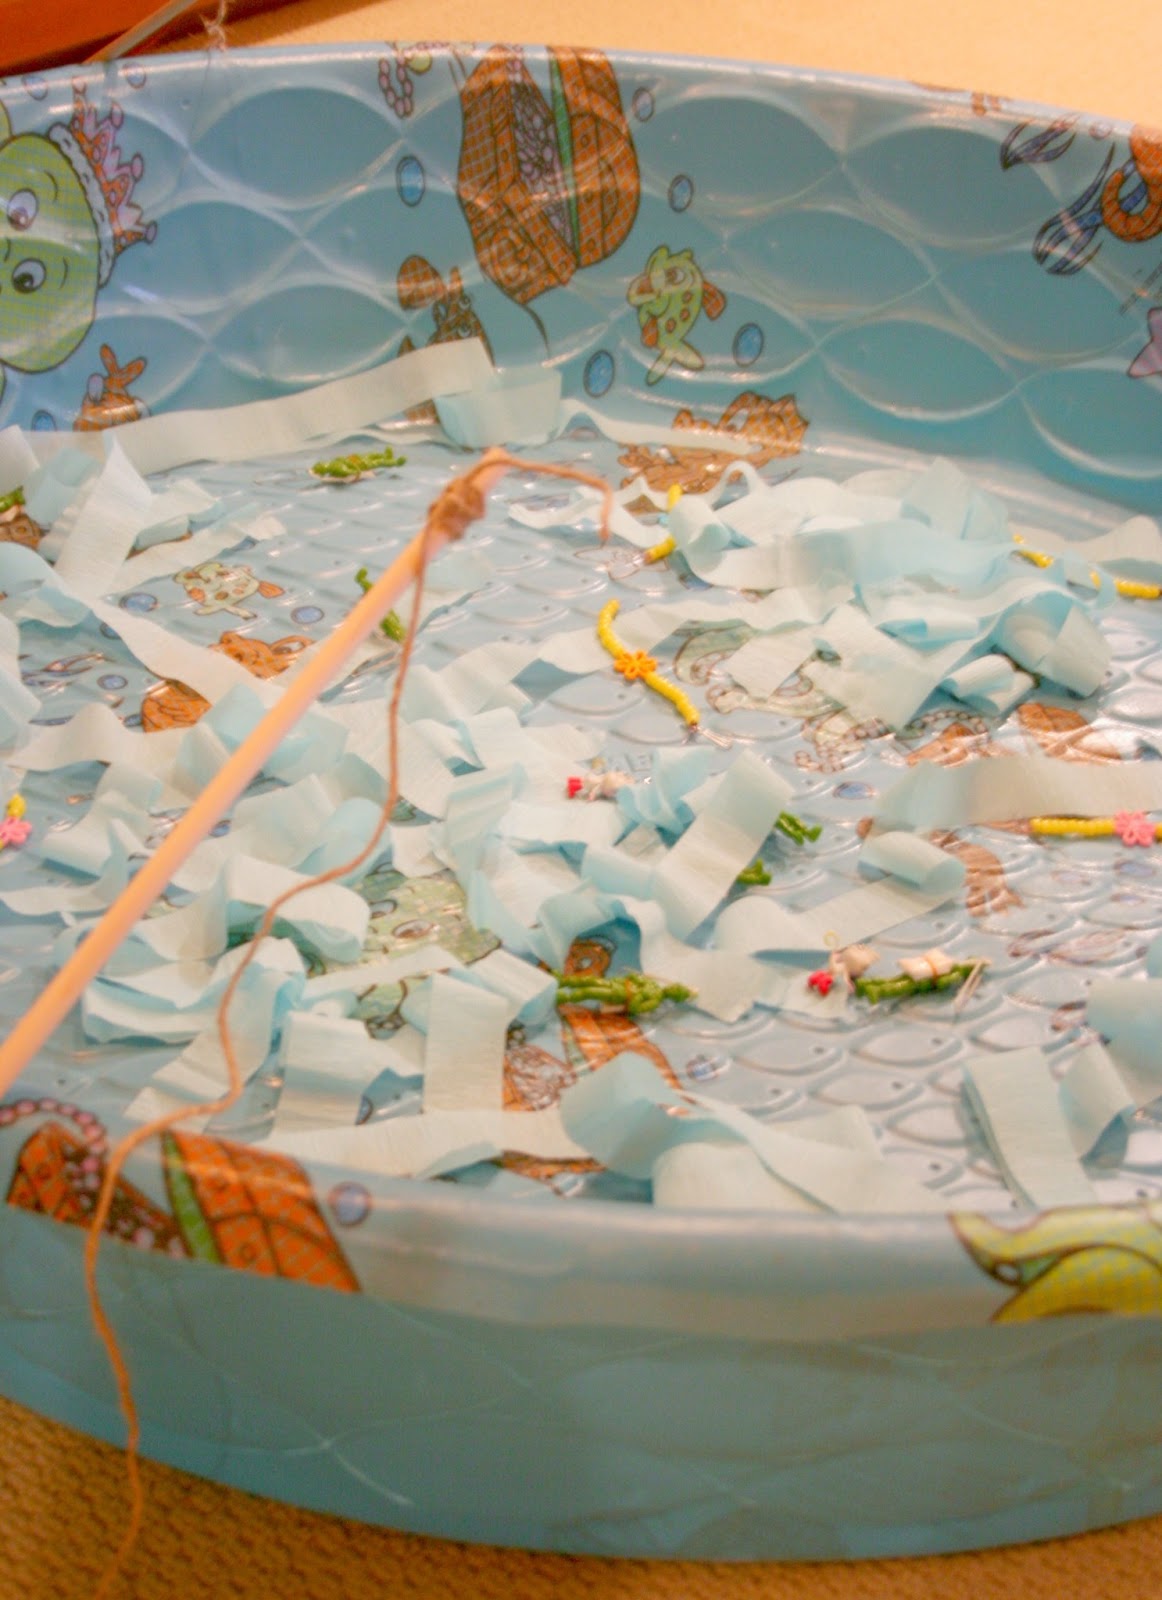
Next was Sparkle Lake - a kiddie pool filled with treats (with paperclips attached) and home made magnetic fishing polls ready to reel in the goods.
And third stop was Star Island - my home made paper cut out "island" with a cardboard palm tree to boot. The kids got to make Dora Stars at this spot using foam stars, stickers, puff balls, markers and glue.

Once all the treasures where found lunch was served followed up by a yummy chocolate birthday cake from Costco. Have you had their cake? I don't normally like cake but this stuff is gooooood!

My daughter agrees.
My other tips for hosting a successful toddler party at your house are...
1. Keep things moving. Start activities soon after guests arrive. Follow that right up with food and cake. Then if the kiddos want to stick around and play they can do that for as long as they want. But attention spans are short and nap / bedtimes creep in so don't take your time, get right to it.
2. If guests bring presents hold off on opening them until after the party. It is really hard for kids to sit still and watch someone else open toys. They run around. They grab the presents. They just don't really get it. So open the gifts once everyone has gone home. Take pictures if you want and send them with thank you cards. And then just be specific in your thank you notes so everyone knows their specific present was opened and appreciated.
3. Can your decorations also be party gifts? This happened by accident but it is something I will definitely remember in the future. We decorated the play room with milar (sp?) balloons from the dollar store. And as they left a number of little ones asked if they could take one home. Heck yeah! An extra gift for them and one less thing to clean up for me. I take full credit for that brilliance.
4. My last tip is to give people jobs. If you can ask friends or family to help with a few things during the party then their is a much better chance of you actually enjoying it. Assign picture taking. Ask someone to get the cake out of the fridge at a certain time. I even assigned my mom to lead my daughter through the activities so I could watch all the kids having fun.
Happy Partying!
No comments:
Post a Comment